I met famed fashion illustrator Antonio Lopez when I was 18 years old. My cousin Stacy was attending Art Center College of Design and invited me to a lecture and workshop he was hosting there. I was studying fashion design at what was then Otis Parsons and jumped at the chance to meet the illustrator whose dynamic compositions donned the pages of Interview and Vanity Fair.
He gave a presentation about his work as a fashion illustrator and then hosted a two day drawing workshop in a large open studio with about 100 students, 10 high fashion models, his assistant Juan Ramos and a bengal tiger. Yes, I did say bengal tiger... While he taught us to draw he also painted a ten foot tall by forty foot foot wide mural that was to hang in the windows of Bloomingdales. I will never forget watching him work - his sweeping black brush strokes brought the white canvases alive in front of my eyes with such elegance and high fashion I was star struck. At the end of the workshop he signed posters for the students. I waited in line thinking of something clever to say when it was my turn. I hadn't done much drawing in class (I was a beginner and not confident in my work) and had shied away from starting conversations with him or asking for critiques. He signed my poster with his name and a series of numbers. I asked him if those were his lucky lottery numbers and he replied, "it's my phone number, call me when you are in New York!"
Jump ahead into the twenty-first century and I now have the pleasure of imparting some of his wisdom to a group of eight middle school students at da Vinci Arts Middle School in Portland, OR. Yesterday we had a lesson on illustrating hands and feet (in shoes.) These kids are fearless and already understand gesture, line weight and composition. I am so inspired by their energy! I wish I could bring them all back to 1985 to that room at Art Center so they could draw in the presence of Antonio and his entouragé. I would love to see what they would have created! For the record I did meet up with Antonio in NYC. I followed him to a class he taught at Altos de Chavon in the Domincan Republic and cried when he died of aids in 1987. He was a generous and wonderful person who taught me how to see with my hands.
Wednesday, April 25, 2012
Monday, April 16, 2012
'New Eyes' Paper Quilts
"Are there any parents who would be interested in working on the class auction project this year?"
Me, "YES!!!"

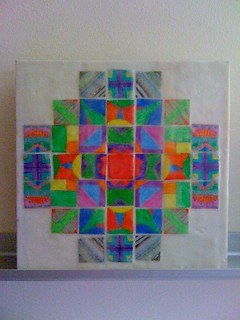
I am usually the first one to raise my hand when a teacher asks for help with an art project. I love working with the students on group projects. Last year we made two beautiful quilts (which you can read about here and here) which raised over $1,000 for the school. It was a great project, but it was also a huge time and a bit of a financial investment. This year I was determined to figure out something that was cost-free and didn't take time away from the students -- or my -- work. This project was practically free to make: the students used class supplies (colored pencils and white card stock) and I bought the birch frames from Muse Art+ Design, a local art store.
The students were studying ancient cultures and I worked with their dynamic core teacher, Christie King to come up with a project that was in line with what they were learning about. Her students had just finished a mandala project and their pieces were stunning. I recalled an exercise I had done in my foundation year at Otis Parsons where we made a small 1" window to find an interesting design element on a piece of classic architecture. We then redrew it to create a new design (and in the original lesson there was a mess of plaster ice cubes and pigment that I won't go into now...)
We asked the students look at their mandalas through a 1 1/2" square "window" and draw the area that inspired them four times. Additionally, Christie asked the students to each create a mini mandala using the same 1 1/2" square and choosing two colors that were next to each other on the color wheel. The students drew during class time and the results were stunning.
I worked with Portland artist and professor Sarah Wolf Newlands to finish the pieces. She patiently taught me how to finish the smaller pieces with a wax coating and after I understood how difficult that was we decided the best way to finish the large piece was with an acrylic matte medium.
I shared this quote with the students when I presented the project to them:
'The voyage of discovery is not in seeking new landscapes but in having new eyes.'
Marcel Proust
The pieces are up for auction this Friday and will raise money for da Vinci Arts Middle School. I have no doubt they will be well received. Great work everyone!
Me, "YES!!!"


I am usually the first one to raise my hand when a teacher asks for help with an art project. I love working with the students on group projects. Last year we made two beautiful quilts (which you can read about here and here) which raised over $1,000 for the school. It was a great project, but it was also a huge time and a bit of a financial investment. This year I was determined to figure out something that was cost-free and didn't take time away from the students -- or my -- work. This project was practically free to make: the students used class supplies (colored pencils and white card stock) and I bought the birch frames from Muse Art+ Design, a local art store.
The students were studying ancient cultures and I worked with their dynamic core teacher, Christie King to come up with a project that was in line with what they were learning about. Her students had just finished a mandala project and their pieces were stunning. I recalled an exercise I had done in my foundation year at Otis Parsons where we made a small 1" window to find an interesting design element on a piece of classic architecture. We then redrew it to create a new design (and in the original lesson there was a mess of plaster ice cubes and pigment that I won't go into now...)
We asked the students look at their mandalas through a 1 1/2" square "window" and draw the area that inspired them four times. Additionally, Christie asked the students to each create a mini mandala using the same 1 1/2" square and choosing two colors that were next to each other on the color wheel. The students drew during class time and the results were stunning.
I worked with Portland artist and professor Sarah Wolf Newlands to finish the pieces. She patiently taught me how to finish the smaller pieces with a wax coating and after I understood how difficult that was we decided the best way to finish the large piece was with an acrylic matte medium.
I shared this quote with the students when I presented the project to them:
'The voyage of discovery is not in seeking new landscapes but in having new eyes.'
Marcel Proust
The pieces are up for auction this Friday and will raise money for da Vinci Arts Middle School. I have no doubt they will be well received. Great work everyone!
Thursday, April 12, 2012
'Think Outside the Block' Camp 1 Highlights
Last summer I took an improvisational quilting class with Denyse Schmidt at PNCA. I really enjoyed the energy of the room and when the class ended I decided to start an improv bee on flicker so I could continue exploring this style of quilting. Several people from that class joined the camp as did quilters from all over the world! There are two camps running right now and a third one is just about to start. The way it is set up is that each camper has a month to be 'counselor' and send fabrics and an improv challenge to the group. Here are some highlights (lots more photos on the flickr page!) from Camp 1.
October: Dustin's 'Red Xs'
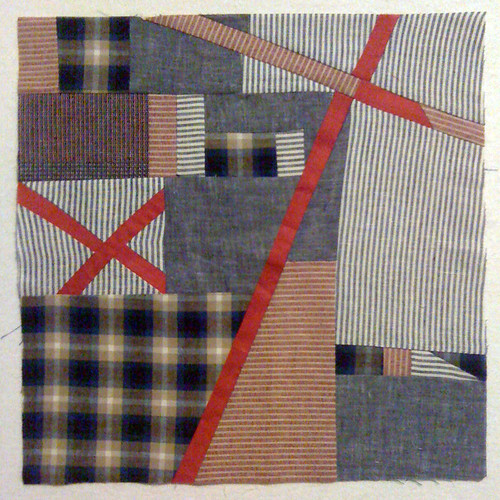
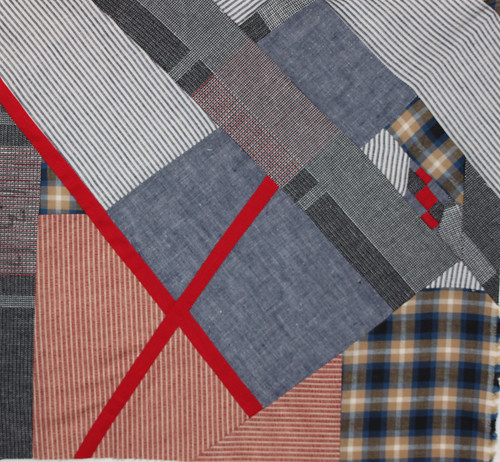
Dustin wanted his quilt to have a 'homespun' look. He asked that somewhere in our block we create a red X. Here are some of the blocks:


November KMQuilts Ocean Dreams
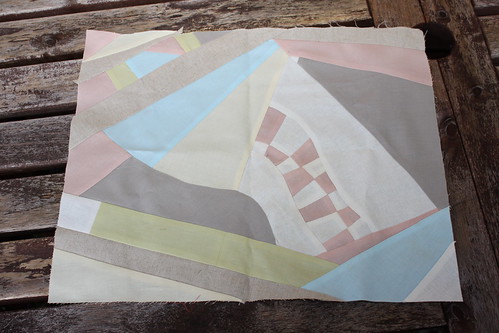
KMQuilts (also of Nubees) asked us to use the ocean for our inspiration for our blocks and send fabrics which were a soft pastel palette.



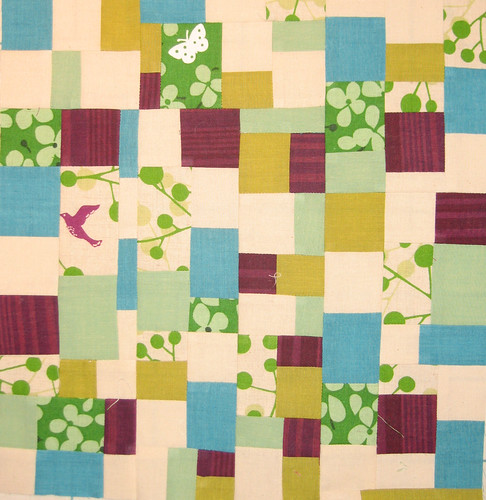
I had January and asked for everyone to use a 'confetti' technique. I cut into my precious Echino fabric I had been saving and sent some shot cottons as well.

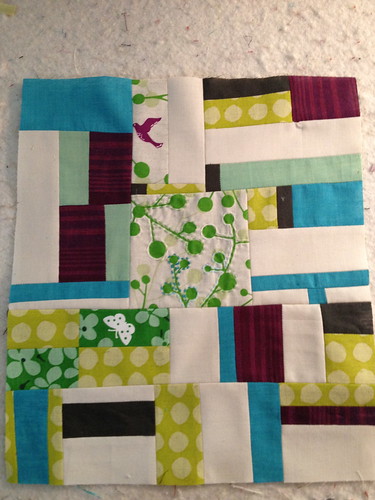
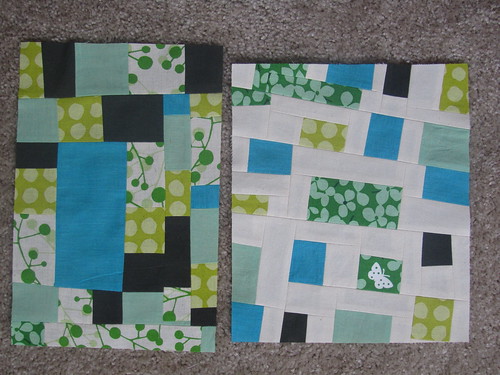
For February jamie.sews challenged us to be inspired by trains and cargo shipping containers. She asked that we make blocks that were rectangles.


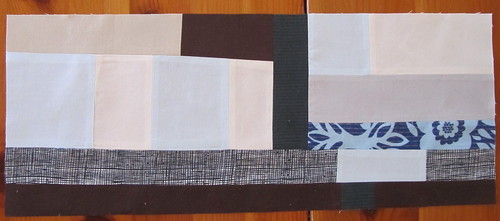
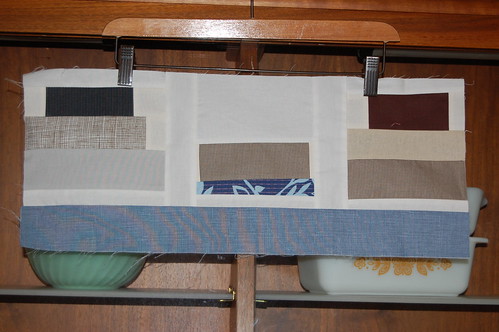
And for March, littlemammaD sent us fabric from her husbands old work shorts and had us make Gee's Bend-inspired blocks.
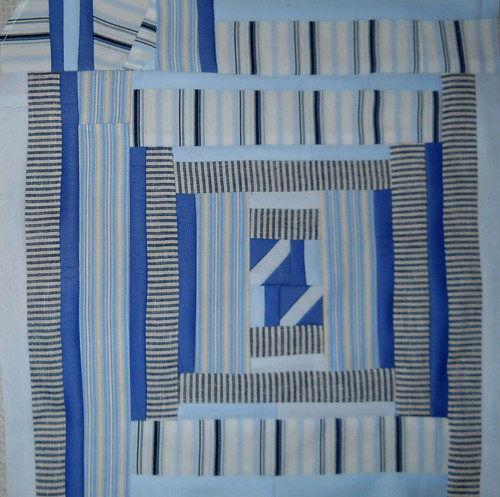
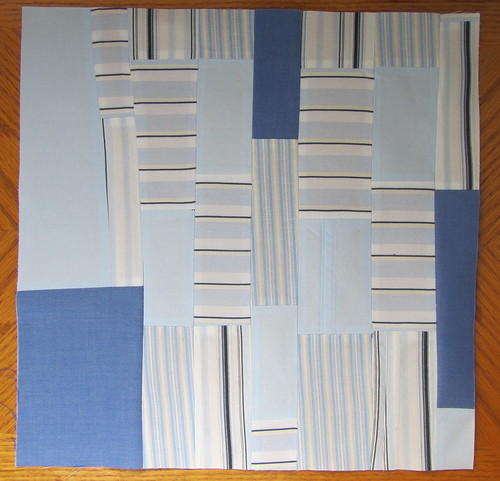

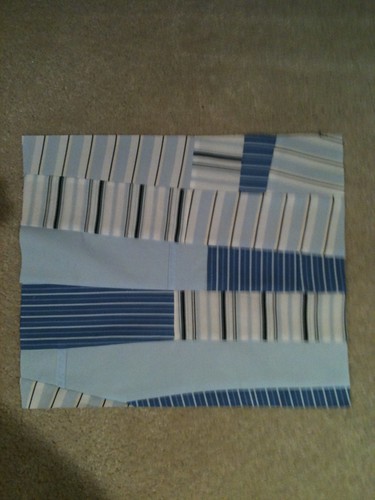
Check out the flickr group for lots more inspiration! And if you are interested in participating we are looking for 3-4 more folks for Camp 3! *CAMP 3 IS NOW FULL* taking reservations for camp 4.
Have Machine, Will Travel
Michelle
October: Dustin's 'Red Xs'
Dustin wanted his quilt to have a 'homespun' look. He asked that somewhere in our block we create a red X. Here are some of the blocks:


November KMQuilts Ocean Dreams
KMQuilts (also of Nubees) asked us to use the ocean for our inspiration for our blocks and send fabrics which were a soft pastel palette.


I had January and asked for everyone to use a 'confetti' technique. I cut into my precious Echino fabric I had been saving and sent some shot cottons as well.


For February jamie.sews challenged us to be inspired by trains and cargo shipping containers. She asked that we make blocks that were rectangles.


And for March, littlemammaD sent us fabric from her husbands old work shorts and had us make Gee's Bend-inspired blocks.


Check out the flickr group for lots more inspiration! And if you are interested in participating we are looking for 3-4 more folks for Camp 3! *CAMP 3 IS NOW FULL* taking reservations for camp 4.
Have Machine, Will Travel
Michelle
Monday, April 9, 2012
Leibster Dearest

I won a Leibster award! The kind, talented and fellow PMQG guild member Linda of Surrounded by Scraps awarded me one. Thanks Linda! Leibster Awards are for bloggers who have less than 200 followers. At the moment I have 6 wonderful dedicated folks who have clicked on the 'follow this blog' link and are stuck with me forever! Cool concept. And now I get to 'award it forward.'
Here are the rules:
1. Thank my Liebster Blog Award presenters. *Thanks Linda!*
2. Link back to my presenters' blogs.
3. Copy & paste the blog award on my blog.
4. Present the Liebster Blog Award to five blogs with 200 or fewer followers that I feel deserve to be noticed and post links to their blogs on my blog.
5. Let the recipients know they have been given the Liebster Blog Award by posting a comment on their blog.
And the Leibster goes to:
1. The Tattered Market Place Vicki Wooten-Athey makes the most magical jewelry and crowns. I have the privilege of working with her on occasion at the Pendleton Woolen Mill store.
2. I've been in a few Flickr bees with Fairly Merry and she is so super creative! She is one of the Camp Counselors for Design Camp [think outside the block] this month and I can't wait to see what her campers create.
3. likewise, Little Ms. Sew-Unsew aka littleMamaD is also a Design Camper. She just hosted the March swap and gave us a really fun project using her husbands old shirts.
4. And then there is Deb of Trio Stitch Studio. We have crossed paths in a few Flickr Bees: Nubee and the 3x6 bee. She is a Design Camp counselor and will be hosting in October, which sounds far away now, but I'm sure it will be here soon enough!
5. And lastly, the always entertaining, always inspiring Rachel of 2nd Ave Studio has 189 followers. Soooo close to 200! She is crazy talented and deserves 1,000 followers. I tip my hat to you. PS thanks for following me.
and I know the rules say 5 but I'd be remiss if I didn't give out one more:
6. Goes to Gail the hexagon queen. Watch her dragon come to life on her blog I think sew. I've never seen so many tiny pieces in my life! PS: is I Think Sew a reference to an 80s song that I now can't get out of my head? PSS Gail thanks for being one of my followers! PSPS - Gail, Linda gave you one too, but I wanted to second it -- so you don't need to award it forward on my behalf.
4, revisited. I was in 2 bees last year and one was the 3 x 6 Mini Bee. I would like to award them a Leibster because the bee was so much fun and I met so many talented and interesting people by participating in that bee. Cute new blog BTW!
Check out these fun and creative blogs. Follow them if you will. And thanks, as always, for reading my blog.
Have machine, will travel.
Michelle
PS - it really is a small world - I just linked back to one of the bloggers on Linda's orginal post and she had already awarded Deb of Trio Stitch a Leibster! So I'll pick someone else, but Deb, know that you are Leibster-worthy in my opinion too!
Monday, April 2, 2012
The Bad-a** Block
Why is it that sometimes the things that seem the easiest also tend to be the most difficult? I spent my spring break trying to figure out how to make a quilt block. If you have done this before please let me know, because I am starting to think I might be a bit crazy! Okay, we already knew that, but seriously... a week for a simple (looking) block? Who knew!

Two months ago, Cathy Miller, co-founder of Michael Miller Fabrics, presented their new collection of Couture Cottons at the Portland Modern Quilt Guild. Thanks to Violet Craft (of Peacock Lane fame), they donated fabric for a guild challenge. We were challenged to make a 15 1/2" x 18 1/2" block using the fabrics and 16 of those blocks would be chosen to be featured in a quilt and shown in the Michael Miller booth at Quilt Market. Well, that sounded like fun so I kept an open mind and waited for inspiration to strike. That moment happened on a walk on the promenade in Seaside, Oregon.

Originally I noticed the cinder blocks in the wall in the foreground of the photo (those of you who know me know I have a weird obsession with cinder block bricks!) but then I started to stare at the wall in the background. I played around with the math in my head and in my mind it worked swimmingly. I was excited to get home and make the block.
The block needed to be precise, so I drew my plan using Adobe Illustrator. I created a page that was the finished size of the block (meaning no seam allowances) and built the block pieces to the sizes I thought would work. My theory worked perfectly and I moved onto a test block.

The plan was to cut 3 1/2" x 6 1/2" strips (or bricks) and use a quarter square rectangle technique for the grey triangles that fellow guild member Rachel Kerley had demonstrated at an all day sew. The technique was a bit of a brain tease, but it was really fun once I got the hang of it. The only problem was the rows kept coming out 1/2" smaller than planned. I was baffled so I decided to make a template. Same thing happened. I checked and rechecked my seam allowances but they measured out to 1/4". I showed the block to Nancy Stoval and Susan Beal and emailed my cousin Jan and pulled out my go-to Barbara Brackman book for help. I was getting frustrated so I gave up for the day. The next morning I decided to try adding 1/8" all around to my template. It didn't make sense mathematically but sometimes in sewing you have to add a bit of ease. I held my breath and sewed the row together. Success! It worked! But... The second time I made a row it shrunk 1/2" again. Huh?

I desperately wanted to figure this out but I was ready to quit. It was just a quilt block afterall. I could make a similar block using tumblers or flying geese but the fact of the matter was I would still HAVE TO DO THE MATH! Grr. The good news was that the guild had a second 'improv block' challenge and I now had plenty of scraps to cut up and use for that. Then it hit me. What if the fabric shrank slightly on the cross grain? I had cut some of the pieces with the long side on the length and some with it on the cross. Could it be? I did an experiment and by golly it was! The fabric seemed to shrink more when I cut it on the cross grain. Strange, I know - but that solved the problem.
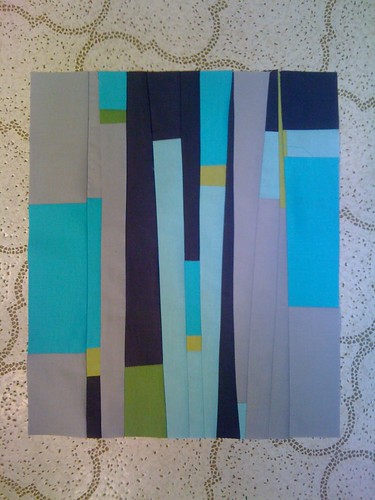
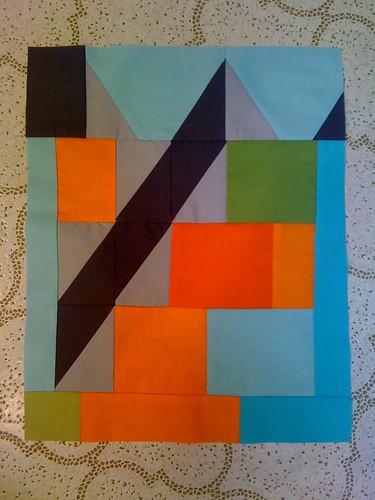
To celebrate I made two improv blocks with my left over scraps.
Susan also has a terrific tutorial for how she made her challenge block on the PMQG blog. When I finished my block I texted her a picture of it. She wrote back that her husband said it was Bad-a**. Therefor I have aptly named my Seaside block the Bad-a** block. I have posted the template I made for it here. If you want to make this and have any questions please let me know. I certainly have had alot of practice making it! And, if you want to see what other guild members are making check out their work in the PMQG flickr group. They have come up with some terrific designs!
PS I did a little presentation on improv at the last PMQG meeting. There are some photos and slides from that posted here.

Two months ago, Cathy Miller, co-founder of Michael Miller Fabrics, presented their new collection of Couture Cottons at the Portland Modern Quilt Guild. Thanks to Violet Craft (of Peacock Lane fame), they donated fabric for a guild challenge. We were challenged to make a 15 1/2" x 18 1/2" block using the fabrics and 16 of those blocks would be chosen to be featured in a quilt and shown in the Michael Miller booth at Quilt Market. Well, that sounded like fun so I kept an open mind and waited for inspiration to strike. That moment happened on a walk on the promenade in Seaside, Oregon.

Originally I noticed the cinder blocks in the wall in the foreground of the photo (those of you who know me know I have a weird obsession with cinder block bricks!) but then I started to stare at the wall in the background. I played around with the math in my head and in my mind it worked swimmingly. I was excited to get home and make the block.
The block needed to be precise, so I drew my plan using Adobe Illustrator. I created a page that was the finished size of the block (meaning no seam allowances) and built the block pieces to the sizes I thought would work. My theory worked perfectly and I moved onto a test block.

The plan was to cut 3 1/2" x 6 1/2" strips (or bricks) and use a quarter square rectangle technique for the grey triangles that fellow guild member Rachel Kerley had demonstrated at an all day sew. The technique was a bit of a brain tease, but it was really fun once I got the hang of it. The only problem was the rows kept coming out 1/2" smaller than planned. I was baffled so I decided to make a template. Same thing happened. I checked and rechecked my seam allowances but they measured out to 1/4". I showed the block to Nancy Stoval and Susan Beal and emailed my cousin Jan and pulled out my go-to Barbara Brackman book for help. I was getting frustrated so I gave up for the day. The next morning I decided to try adding 1/8" all around to my template. It didn't make sense mathematically but sometimes in sewing you have to add a bit of ease. I held my breath and sewed the row together. Success! It worked! But... The second time I made a row it shrunk 1/2" again. Huh?

I desperately wanted to figure this out but I was ready to quit. It was just a quilt block afterall. I could make a similar block using tumblers or flying geese but the fact of the matter was I would still HAVE TO DO THE MATH! Grr. The good news was that the guild had a second 'improv block' challenge and I now had plenty of scraps to cut up and use for that. Then it hit me. What if the fabric shrank slightly on the cross grain? I had cut some of the pieces with the long side on the length and some with it on the cross. Could it be? I did an experiment and by golly it was! The fabric seemed to shrink more when I cut it on the cross grain. Strange, I know - but that solved the problem.
To celebrate I made two improv blocks with my left over scraps.


Susan also has a terrific tutorial for how she made her challenge block on the PMQG blog. When I finished my block I texted her a picture of it. She wrote back that her husband said it was Bad-a**. Therefor I have aptly named my Seaside block the Bad-a** block. I have posted the template I made for it here. If you want to make this and have any questions please let me know. I certainly have had alot of practice making it! And, if you want to see what other guild members are making check out their work in the PMQG flickr group. They have come up with some terrific designs!
PS I did a little presentation on improv at the last PMQG meeting. There are some photos and slides from that posted here.
Subscribe to:
Posts (Atom)


